
Clinically Annotated Otoscopy Images of Ear Wax, UK Red Flags and Care

Otoscopy images reliably show the appearance and extent of earwax, from a thin film of normal cerumen to a fully impacted plug that blocks the canal. The gallery below covers normal, partial, and impacted presentations, plus a before and after removal comparison. Photos are a useful reference, but they cannot replace a clinical otoscopy examination if you have pain, hearing loss, or discharge.
TL;DR:
A complete canal occlusion prevents assessment of the eardrum, requiring professional removal to evaluate underlying issues or infections.
Dark, crumbly wax in photos suggests debris or dead skin, not necessarily a serious problem, but persistent symptoms still need medical evaluation.
Soft, impacted, or dense wax can look similar in images, but only a clinician can determine if removal is necessary based on symptoms and examination.
Home removal attempts with cotton buds are unsafe; softening drops often fail within days, making professional assessment the safer and more effective choice.
Otoscopy images are useful for reference but cannot replace direct clinical examination, especially when symptoms like pain, discharge, or hearing loss are present.
What otoscopy images of ear wax actually show
An otoscope gives a magnified, illuminated view down the ear canal, and that view is what separates a harmless smear of cerumen from a plug that needs professional attention. Otoscopy is the standard method clinicians use to detect wax and judge how much of the tympanic membrane it obscures. Below is a representative range of what clinicians typically photograph during assessment.
Normal cerumen: a thin, honey-coloured coating on the canal wall, with most of the eardrum clearly visible behind it. No symptoms are usually reported.
Partial obstruction: a soft, amber mass covering perhaps a third to half of the canal. The eardrum is still partly visible, and patients often describe mild muffling rather than true hearing loss.
Soft, sticky wax: pale yellow and glossy in appearance, sitting loosely against the canal wall. This type tends to clear on its own or respond well to softening drops.
Hard, dense wax: darker, drier, and more tightly packed against the canal skin. It often causes a sensation of fullness and is more resistant to softening.
Impacted plug: a solid, occluding mass, sometimes almost black, filling the canal from the opening to the drum. The tympanic membrane is not visible at all, and patients frequently report sudden hearing loss, tinnitus, or an itchy, blocked feeling.
Wax with debris: a mixed, crumbly texture combining cerumen with skin flakes, occasionally mistaken for infection when it is simply old, oxidised wax.
Before removal: the canal shown fully occluded by a firm, dark plug, with no drum visible on examination.
After removal: the same canal following microsuction, showing a clean canal wall and a fully visible, healthy tympanic membrane.
That before and after pair is the clearest demonstration of why visual assessment matters. A canal that looks alarming on first glance is often a straightforward case once the wax is cleared under direct vision, and the improvement in the image usually matches the patient’s own report of clearer hearing within minutes.
How to interpret colour, texture and warning signs in ear wax images
Reading an otoscopy image comes down to three things: colour, texture, and how much of the canal is blocked.
Colour: fresh cerumen is typically pale yellow to amber. Darker, brown or near-black wax is usually just older wax that has oxidised and picked up more debris, not a sign of infection on its own.
Texture: flaky or dry wax tends to shift and clear easily. Soft, sticky wax sits more persistently against the canal wall. Hard, dense plugs are the type most likely to need professional removal rather than home softening.
Occlusion: partial blockage still allows a view of the eardrum, which helps a clinician rule out other causes of symptoms. Complete occlusion hides the drum entirely, and clinical guidance treats this as impacted wax requiring removal before any further diagnosis can proceed, since it can fully obscure the eardrum.
Red flags: bleeding, persistent discharge, a visible hole in the drum, or intense redness in the canal are not typical wax findings. These need same-day clinical review, not home treatment.
Pro Tip: If a photo of your own ear (taken with a home otoscope camera) shows dark, crumbly material rather than a smooth, solid mass, that is far more likely to be debris and dead skin than a serious problem, but persistent symptoms still deserve a proper look.
When wax blocks the view and otoscopy reaches its limits
A standard otoscope only shows what light can reach, and dense cerumen stops that light dead. When a plug fills the canal, the tympanic membrane simply cannot be assessed, which means any underlying issue, an infection, a perforation, a growth, stays invisible until the wax comes out.
Complete occlusion prevents any assessment of the eardrum, regardless of how experienced the examiner is.
Some modern digital otoscopes with a distal camera tip can occasionally manoeuvre around a gap in the wax to catch a partial view of the drum, but this depends heavily on the equipment and where the wax sits.
Even with that technology, a partial view is not a substitute for full clearance when there is any suspicion of disease.
If the drum is not visible on examination, a clinician will typically remove the wax first so the canal and eardrum can be fully and safely assessed.
This is precisely why photographs alone, however clear, are a starting point for understanding, not a diagnosis.
When to seek professional ear wax removal and which methods clinicians use
Certain symptoms mean a photo isn’t enough and you need a clinician to look directly. Book an assessment if you notice:
Marked or sudden hearing loss
Ear pain or a feeling of pressure that doesn’t settle
Discharge, especially if it smells or looks unusual
Dizziness or vertigo
Bleeding from the ear
A history of ear surgery or a known perforated eardrum
Professional removal generally uses one of three evidence-based methods: microsuction, irrigation, or manual instrumentation. Microsuction removes wax under direct vision using gentle suction, keeps the ear dry, and is commonly the first choice in ENT practice, particularly for patients with a history of ear surgery or recurrent wax. Irrigation uses warm water at controlled pressure and works well for many patients, though it’s contraindicated if there’s a perforation, recent ear surgery, or active infection. Manual instrumentation, using fine specialist tools, suits certain presentations where suction or water aren’t appropriate. A competent clinician chooses based on your history and what the otoscope actually shows, not a fixed default.
Public health guidance is consistent on one point: don’t attempt DIY removal, and never use cotton buds, which routinely push wax deeper into the canal and can risk injury to the eardrum. If softening drops haven’t shifted mild symptoms within a few days, that’s the point to book an assessment rather than persist with home methods, as detailed in our guide to safe ear wax removal.
How EARS Clinics uses otoscopy imaging in patient care
EARS Clinics’ Aural Care Specialists are NHS-accredited, and the clinics themselves are registered with Healthcare Improvement Scotland, one of the regulatory routes (alongside the Care Quality Commission for England) that governs safe standards in ear care. During assessment, practitioners routinely capture otoscopy images before and after treatment, giving patients a direct record of their canal and letting the clinician confirm the eardrum is fully visible once wax has been cleared.
Appointments are built around convenience without cutting corners on safety:
In-clinic appointments across Glasgow and Edinburgh, priced at a typical clinic rate for adults and a higher rate for under-18s
Same-day slots for urgent symptoms
Home visits for those unable to travel, at £180
Microsuction, irrigation, and manual instrumentation, each chosen according to the individual’s history and what the otoscopy examination reveals
Full detail on what an appointment involves is available on the ear health check page.
Why the photo is only half the story
The conventional advice on this topic tends to stop at “here’s what wax looks like,” as though recognition were the finish line. It isn’t. The genuinely useful skill isn’t spotting wax in a photo, most people can do that, it’s recognising when an image is telling you the eardrum simply isn’t visible, and understanding that this absence of information is itself a clinical finding.
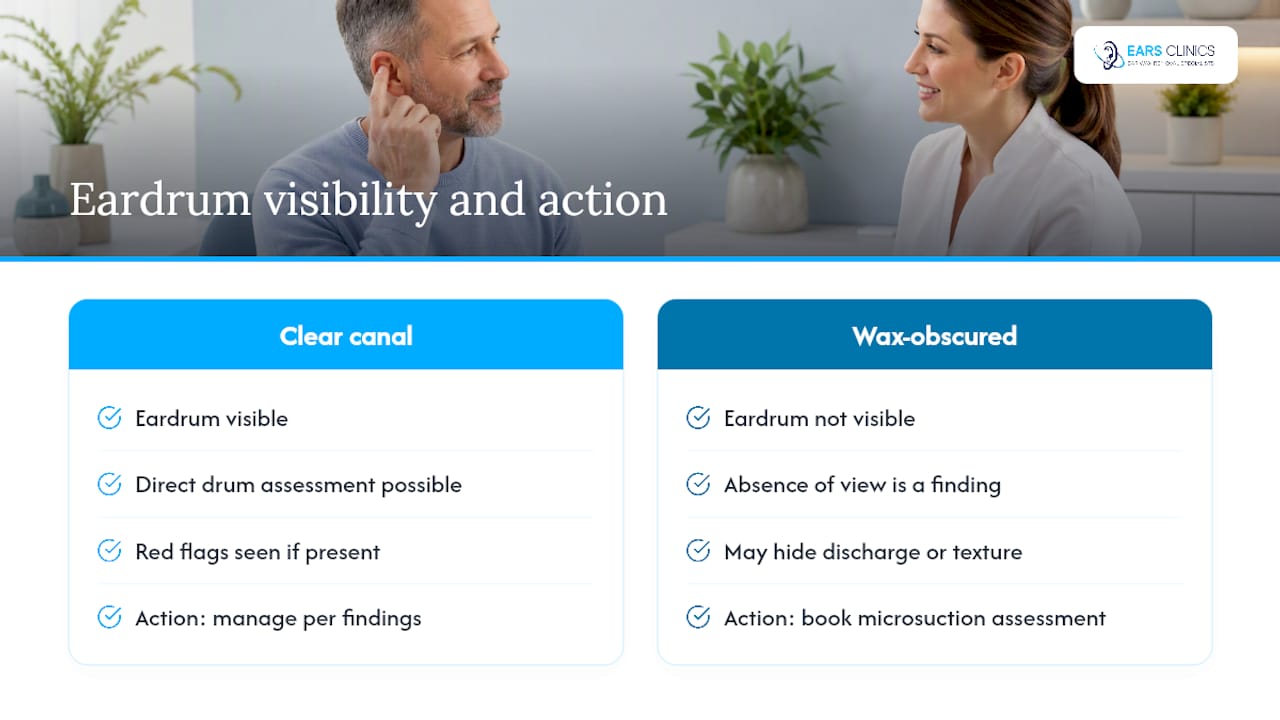
What gets underestimated is how often a normal-looking, minor blockage sits right next to a red flag that has nothing to do with wax at all: discharge, a suspicious texture, a hint of the drum that looks wrong even through the gap. A gallery of images teaches pattern recognition. It cannot teach judgement about what to do when the pattern doesn’t quite fit.
Prioritise this: if your ear feels blocked and a photo shows total occlusion, don’t chase softening drops for weeks hoping it clears. Book a microsuction assessment with a regulated clinician, get the canal cleared, and let a trained eye confirm what the drum actually looks like underneath.
— EARS
Sources
Recommended