
Home remedies for water in your ear: safe steps for adults

Tilting your head, jiggling your earlobe, and gently drying the outer ear with a low-heat dryer are the fastest safe actions to remove trapped water. Most cases resolve within a few hours using these methods alone, though duration may vary. Try the steps below for up to 48–72 hours. If you experience severe pain, discharge, sudden hearing loss, or if you have had recent ear surgery or grommets fitted, stop immediately and contact your GP or NHS 111.
Try these steps now:
Tilt the affected ear towards your shoulder and gently jiggle your earlobe downward.
Lie on your side with the affected ear facing down on a clean towel for several minutes.
Cup your palm tightly over the ear, press gently, then release to create a brief suction effect.
Yawn widely or chew slowly to shift the jaw and encourage water to shift from the canal.
Hop on one foot with the affected ear tilted down to use gravity.
Key takeaways
Safe home remedies for water in your ear work well for most adults, but knowing when to stop and seek professional care is just as important as knowing which steps to try.
Point | Details |
First steps to try | Tilt head, jiggle earlobe, lie on side, palm suction, jaw movements, and low-heat dryer at 30 cm. |
Drying drops recipe | Mix 1 part white vinegar with 1 part isopropyl alcohol; use approximately 1 teaspoon (≈ 5 ml) per ear. |
What to avoid | Never use cotton buds, hairpins, ear candling, or home syringing without knowing your eardrum status. |
When to seek help | Stop home treatment and contact your GP or NHS 111 if symptoms persist beyond 48–72 hours or red flags appear. |
Professional option | Earhealthservice (EARS Clinics) offers same-day microsuction, irrigation, and instrumentation in Glasgow and Edinburgh from £60. |
Why water gets trapped and what it can lead to
The ear canal is a narrow tube running from the outer ear to the eardrum. Its shape, combined with any earwax present, can hold water in place long after you step out of the shower or pool. When moisture lingers, it softens the delicate skin lining the canal, washes away the protective layer of cerumen (earwax), and creates exactly the warm, damp environment that bacteria and fungi need to multiply. According to Mayo Clinic, this process is what leads to swimmer’s ear.

Otitis externa (swimmer’s ear) is the clinical term for an infection of the outer ear canal caused by prolonged moisture, bacterial or fungal growth, or minor skin damage. It produces itching, redness, pain, and sometimes a mild discharge. Common triggers include swimming, frequent showering, wearing earbuds for long periods, a naturally narrow canal, or a build-up of earwax that prevents water from draining freely. Johns Hopkins Medicine notes that trapped water can soften skin and allow germs to enter, raising infection risk considerably.
Home remedies for water in your ear: step-by-step safe methods
These steps work for most adults with no history of ear surgery, perforated eardrum, or ear tubes. Work through them in order, and stop at any point if you feel pain or dizziness.
Tilt and jiggle. Turn your head so the affected ear faces the floor. Reach up and gently pull the outer ear upward and backward to straighten the canal, then jiggle your earlobe. Cleveland Clinic recommends this as the first-line step because straightening the canal gives water a clearer path out.
Lie on your side. Place a clean, dry towel on your pillow and lie with the affected ear facing down for five to ten minutes. Gravity does most of the work.
Palm suction. Cup your palm firmly over the ear, press gently inward, then pull away quickly. Repeat several times. This creates a mild vacuum that can dislodge water sitting deeper in the canal.
Jaw movements. Yawn widely, chew slowly, or move your jaw from side to side. The temporomandibular joint sits directly beside the ear canal; moving it shifts the canal walls and can free trapped water.
Hop on one foot. Tilt your head to the affected side and hop. The combination of gravity and gentle impact often shifts water that the other steps have loosened.
Low-heat blow dryer. Set a hair dryer to its lowest heat setting or a cool setting. Hold it at least 30 cm (roughly 12 inches) from the ear and direct the airflow gently into the canal for 20–30 seconds. NHS guidance supports using a low-heat dryer to aid drying of the outer ear. Never use a high heat setting or hold the dryer close.
Steam inhalation. Sitting over a bowl of hot water with a towel over your head for a few minutes can loosen congestion around the Eustachian tube, which may help if the sensation of fullness is partly related to pressure rather than water alone. Cleveland Clinic lists steam as a supplementary home measure alongside the physical techniques above.
Pro Tip: Before using the blow dryer, pull the outer ear gently upward and backward to straighten the canal first. This lets the warm air reach further in and speeds up evaporation. Keep the dryer moving rather than holding it still.
Safety reminders: stop immediately if you feel pain, vertigo, bleeding, or any unusual discharge. These steps are appropriate for adults with no known ear conditions. For child-specific guidance, see ear health tips for children before attempting any home treatment.
How to make and use homemade drying drops safely
A simple 1:1 mixture of white vinegar and isopropyl (rubbing) alcohol is one of the most widely cited natural cures for ear water. The vinegar creates a mildly acidic environment that discourages bacterial and fungal growth, while the alcohol promotes rapid evaporation of residual moisture. Mayo Clinic News Network gives the standard recipe as one part white vinegar to one part rubbing alcohol, with a typical dose of approximately one teaspoon (around 5 ml) per ear.
How to use the drops:
Mix equal parts white vinegar and isopropyl alcohol in a clean, small container. Prepare only what you need for one use.
Tilt your head so the affected ear faces the ceiling.
Using a clean dropper, instil the mixture gently into the ear canal. One teaspoon (approximately 5 ml) is sufficient.
Hold the position for 30 seconds to allow the solution to reach the water.
Tilt your head the other way and let the liquid drain onto a tissue or towel.
Gently dry the outer ear with a soft cloth. Do not insert anything into the canal.
Parameter | Guidance |
Recipe ratio | 1 part white vinegar : 1 part isopropyl alcohol |
Dose per ear | Approximately 1 teaspoon (≈ 5 ml) |
Frequency | Once or twice after water exposure, not as a prolonged treatment |
Minimum dryer distance | 30 cm (≈ 12 inches) from the ear |
Safe for children without GP advice? | No — consult a GP first |
Use with suspected perforation or grommets? | No — contraindicated |
Safety warning: Do not use these drops if you suspect a perforated eardrum, have grommets or ventilation tubes fitted, have had recent ear surgery, or are treating a child without first speaking to a GP. Using drops in a perforated ear can cause significant pain and worsen the situation. If you are unsure about your eardrum’s status, seek professional advice before instilling anything.
What you should never do to remove water from your ear
Some home treatments for ear blockage that circulate online are genuinely harmful. Knowing what to avoid is as important as knowing what to try.
Cotton buds. WebMD warns that inserting cotton buds pushes wax deeper into the canal, damages the thin skin lining, and can perforate the eardrum. They do not remove water.
Hairpins, fingers, or any object. The skin inside the ear canal is extremely delicate. Anything inserted risks abrasion, infection, or a punctured eardrum.
Ear candling. No credible clinical evidence supports ear candling as a safe or effective method for removing water or wax. It carries a real risk of burns and wax deposits from the candle itself.
Hydrogen peroxide without clinical advice. While sometimes used for wax softening, hydrogen peroxide is contraindicated if a perforation is suspected and should not be used as a quick fix for trapped water without professional guidance.
Vigorous shaking or hitting the side of the head. This can cause dizziness and does nothing to address the underlying issue.
Home syringing without knowing your eardrum status. Irrigating the ear at home when a perforation is present can drive water and bacteria directly into the middle ear, causing serious infection. For safe ear care at home, always confirm your eardrum is intact before any irrigation.
Any worsening pain, bleeding, or sudden hearing loss after attempting any of these methods needs professional review without delay.
When home remedies are not enough: red flags and clinical options
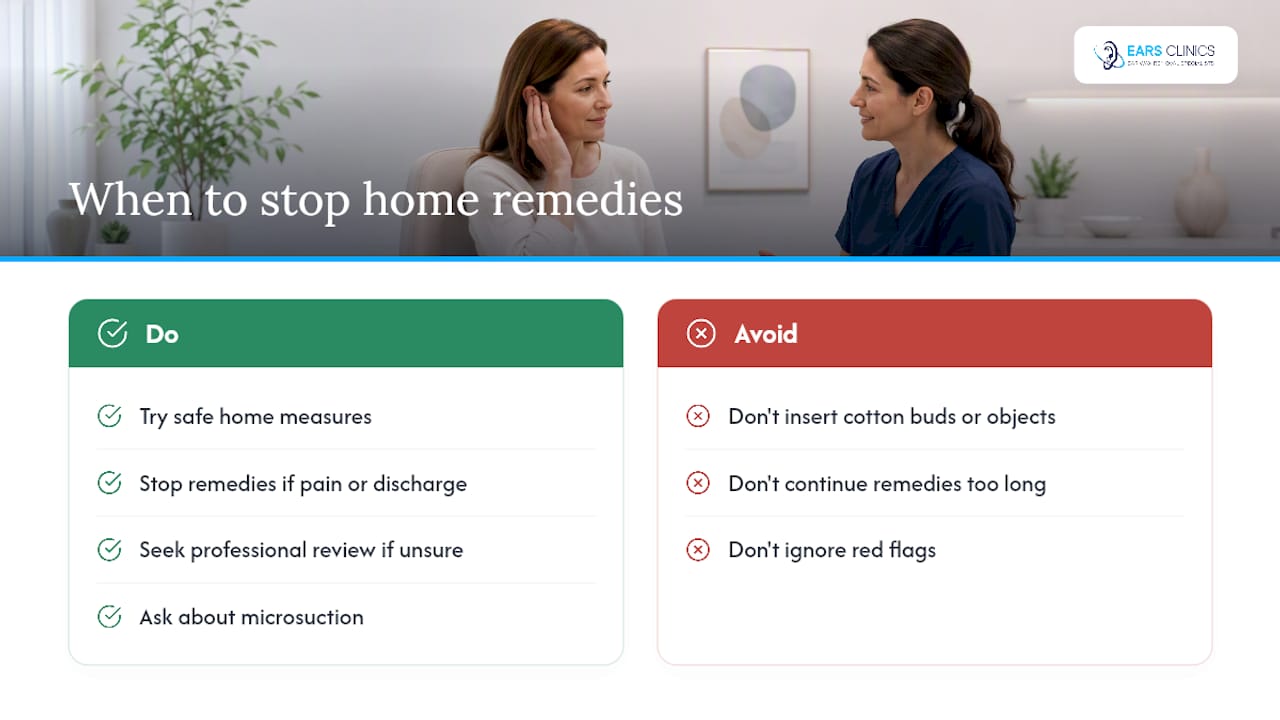
Try the safe home steps for up to 48–72 hours. If symptoms persist beyond that window, or if any of the following appear at any point, contact your GP or NHS 111 rather than continuing to self-treat.
Red flags that need same-day care:
Severe or rapidly worsening pain
Pus or bloody discharge from the ear
Sudden or significant hearing loss
Fever
Dizziness or loss of balance
Symptoms that persist despite home treatment for several days
NHS guidance is clear that severe pain, discharge, fever, or persistent symptoms require professional assessment. If an infection has developed, a clinician may prescribe antibiotic or antifungal eardrops, and sometimes corticosteroid drops to reduce swelling. Johns Hopkins Medicine notes that early professional care prevents complications from progressing.
In the UK, your options include contacting your GP, calling NHS 111 for urgent advice, or booking a private appointment with a regulated ear health clinic. Clinicians will assess whether your eardrum is intact before recommending any drops or irrigation, and will select the safest procedure based on your history and clinical presentation. For emergency ear care guidance, the key principle is: when in doubt, get it checked.
The three main clinical procedures used in the UK are:
Microsuction: the method preferred under current NICE guidelines, using gentle suction under magnification to remove debris without water.
Irrigation: a controlled flow of water used to flush the canal, appropriate when the eardrum is confirmed intact.
Manual instrumentation: the use of fine clinical instruments to remove wax or debris under direct vision.
A trained clinician chooses between these based on examination and your medical history, not a fixed protocol.
How to prevent water getting trapped in the first place
Prevention is straightforward once you know the main risk factors. These ear care tips for swimmers and anyone with regular water exposure are worth building into your routine.
Wear well-fitting silicone earplugs or moulded plugs when swimming. Moulded plugs offer a more reliable seal for frequent swimmers.
After swimming or showering, tilt your head to each side and let water drain naturally before reaching for a towel.
Dry the outer ear gently with a soft towel. Never rub inside the canal.
Remove earbuds promptly after exercise. Sweat and heat create the same moist conditions as water exposure.
If you shower frequently, a cotton ball lightly coated in petroleum jelly placed at the entrance of the canal (not pushed in) can reduce water entry.
Consider over-the-counter preventative drying drops before and after swimming if you have no contraindications. These typically contain the same isopropyl alcohol base as the homemade recipe.
Have excess earwax removed professionally if it is causing repeated water trapping. Excess wax can block drainage and make every swim a problem. A professional wax removal appointment resolves this quickly and safely.
Why the vinegar and alcohol mixture works
The physiological rationale behind this remedy is well established, even if large clinical trials on home use are limited.
Acidity inhibits pathogens. White vinegar (acetic acid) lowers the pH of the ear canal environment. Bacteria and fungi responsible for otitis externa, including Pseudomonas aeruginosa and Candida species, are sensitive to acidic conditions and struggle to proliferate at lower pH levels.
Alcohol accelerates evaporation. Isopropyl alcohol mixes with residual water and evaporates quickly, physically removing moisture from the canal surface.
Combined effect. Together, the two components address both the moisture and the microbial risk simultaneously, which is why Mayo Clinic and Healthline both reference this combination as a commonly used preventive measure.
The evidence base for home use is largely observational and expert-consensus rather than large randomised trials. This is why authoritative sources consistently frame the drops as a preventive measure after water exposure rather than a treatment for an established infection. Once pain, discharge, or hearing changes are present, a clinician should assess the ear before any drops are used.
Component | Mechanism | Contraindicated when |
White vinegar (acetic acid) | Lowers canal pH, inhibits bacterial and fungal growth | Perforated eardrum, grommets, active infection with discharge |
Isopropyl alcohol | Promotes rapid evaporation of residual water | Perforated eardrum, grommets, sensitive or broken skin |
A note from EARS Clinics on safety and professional care
Most cases of trapped water resolve with the simple measures described here, and that is genuinely reassuring. The ear is remarkably good at self-regulating when given a little help. What concerns us clinically is the minority of cases where home remedies are continued beyond the point where they are appropriate, either because the red flags are not recognised or because the discomfort is tolerated rather than investigated.
At EARS Clinics, we see patients who have spent days using cotton buds or inserting objects, often making a straightforward situation considerably more complicated. The physical manoeuvres and drying drops in this article are safe when used correctly and when the eardrum is intact. The moment there is pain, discharge, or any doubt about the eardrum’s status, those methods need to stop.
We are Healthcare Improvement Scotland (HIS) registered, and our Aural Care Specialists are NHS-accredited. Microsuction is our preferred procedure, aligned with current NICE guidelines, but our practitioners also use irrigation and manual instrumentation where clinically appropriate. The choice always depends on the individual patient’s history and what the examination reveals. No single method suits every ear.
Professional ear care at EARS Clinics when home treatment is not working
When home remedies have not resolved the problem within 48–72 hours, or when red flags appear, professional ear care is the right next step.

EARS Clinics offers same-day appointments at our Glasgow and Edinburgh clinics, as well as home visits for patients who cannot travel. Our NHS-accredited Aural Care Specialists are regulated by Healthcare Improvement Scotland (HIS), one of the few regulated ear healthcare providers in Scotland. Appointments for adults are priced at £60, with home visits available at £180.
Our practitioners carry out microsuction, irrigation, and manual instrumentation, selecting the safest and most appropriate method based on your clinical history and examination. There are no lengthy waiting lists and no requirement for pre-treatment softening drops before your appointment. Book online at Earhealthservice or call the clinic directly to arrange a same-day slot.
Sources
This article provides general health information and is not a substitute for professional medical advice. If you are unsure about your symptoms or ear health, consult your GP or a qualified clinician.
Recommended